How to design booklets
A booklet is a small book—with fewer pages and smaller dimensions than a “real” book, and usually a paper cover. UNESCO requires publications that aren’t periodicals to have “at least 5 but not more than 48 pages exclusive of the cover pages.” Anything longer, and it’s a book! Beautiful and functional templates from Marq can help you to easily create a custom “little book” for any occasion. Best of all, absolutely no design software experience is needed.
Haven’t signed up yet?
Give us a try.
 Sign up with Google
By signing up you agree to our Terms of Service and Privacy Policy

Empower your team
Share templates and brand assets with multiple team members and assign team roles to control who has access to what.
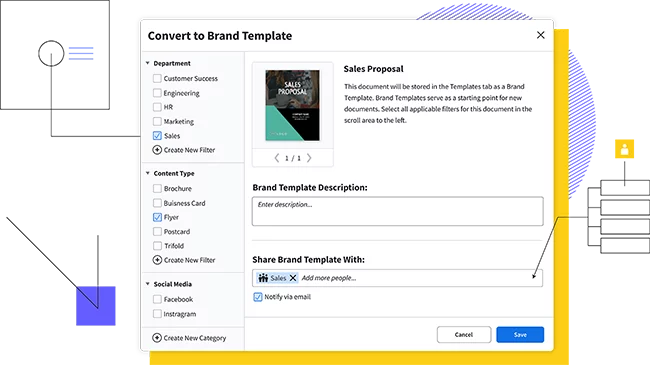
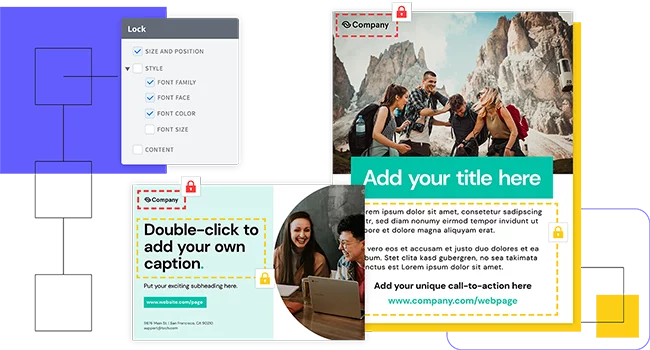
Grow your brand
Advanced template locking empowers team members to customize co-owned templates — without going off-brand, in turn helping ensure content remains consistent.
Quick and easy
Our intuitive, drag-and-drop editor makes creating on-brand content quick and easy.
Purpose of a booklet
Booklets are supremely multi-functional and perfect for story books, instruction guides, reports, product promotions, school projects, event programs, marketing collateral and recipe collections. In the digital age, the attention span of most readers has decreased; booklets make it easy for you to capture and promote your content succinctly and attractively, quickly and cost-effectively.
How to make a booklet
Step 1: Who is your audience?
The design and layout of the draft document for your booklet depends to a large extent on your audience. For instance, you may be working on a hobby Origami project in which case you’ll want to create a poster-sized document that you can fold and crease to create a mini-booklet with just a few pages.
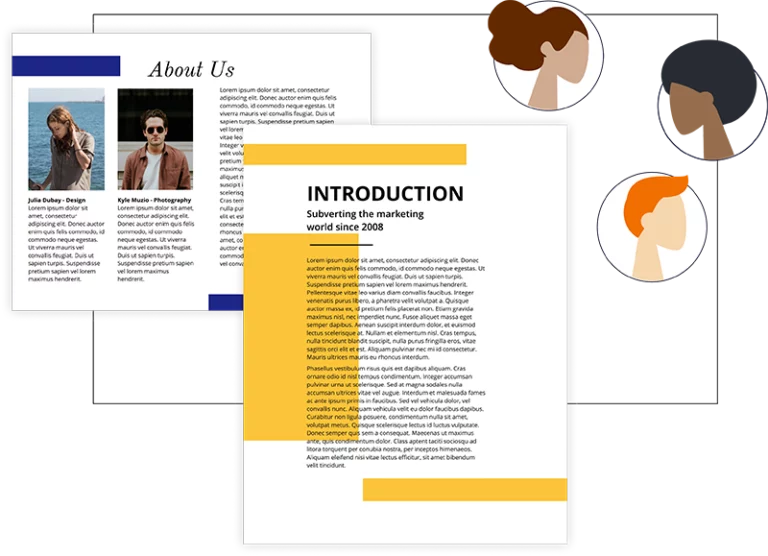
Alternatively, you may be creating a corporate newsletter-style booklet with a lot of text in multiple columns and with only a few images. Marq has a wide variety of newsletter and brochure templates that feature multiple columns and image placeholders for your company’s logo and branding elements.
A third example is a recipe book. In this case, you’ll probably want to ensure all the pages have a consistent layout, and you’ll want to make sure that the book can be laid flat on a kitchen counter… which brings us to binding.
Step 2: Nail down your binding
Your choice of binding will affect the layout of your little book, and it depends on how durable you want your booklet to be and whether you want to open it up flat (like you would for a recipe booklet). Saddle stitching actually uses staples, not stitches, and is most commonly used for booklets with low page counts. It’s the most durable and cost-effective option, but your pages won’t open completely flat. Wire binding requires punching holes through which coils are inserted, so you’ll have to double-check that those gutters and margins are wide enough. Like coil and spiral binding, this option is great if you need to open your booklet up flat, or expect needing to tear out pages for some reason. Perfect binding—also called thermally activated binding—is what is usually used to bind paperbacks. While cost-effective, the downside is that a booklet bound like this won’t lay flat. Perfect binding (not so perfect after all) is not quite as sturdy as other methods, so you should make sure you use top-quality glue (resin). You may want to discuss your printing options with your local printer before you get started.

Step 3: Source images
If you haven’t already, now is the time to source images, pictures and illustrations to jazz up your booklet and make it visually attractive. This is the third step because when you start creating your book outline, you’ll want to know exactly how much space your graphics are going to take up on each page. But, never fear: if your image is a little too big or too small, to change the size, right-click on it and select Edit Crop or Mask from the context menu. Also, experiment with the Mask feature to create beautiful blurred backgrounds for your pages—instant custom paper! One of the places you can source free images is Bing. If you’re a small business and on a budget, the license filter feature is very useful. You can use it to find images that are free to use, even commercially. Look for free online tools like Lucidchart to create business diagrams and flow charts. The Marq interface itself has a professional tool set that not only helps you to create perfect layouts and eye-catching compositions, but can be used to insert tables, and create shape diagrams and infographics.

Step 4: Create an outline
Even though it’s only a small book, the little extra effort spent creating a booklet outline is well worth the time. Marq templates double as layout software and an easy way to create visual mind maps of your content. You can easily drag & drop page elements onto a page and then decide how all the bits and pieces fit together—for instance, where you’re going to include images. The interface is really just a giant sandbox where you can experiment with colors, fonts, graphics & layouts. If you’ve already written your content, the Marq interface will help you verify that your content fits neatly on each page. But you can also dive right in and start writing from scratch right there and then—simply drag & drop a text element onto a page. Backups? All your work is stored safely in the Marq cloud.

Step 5: Design your pages
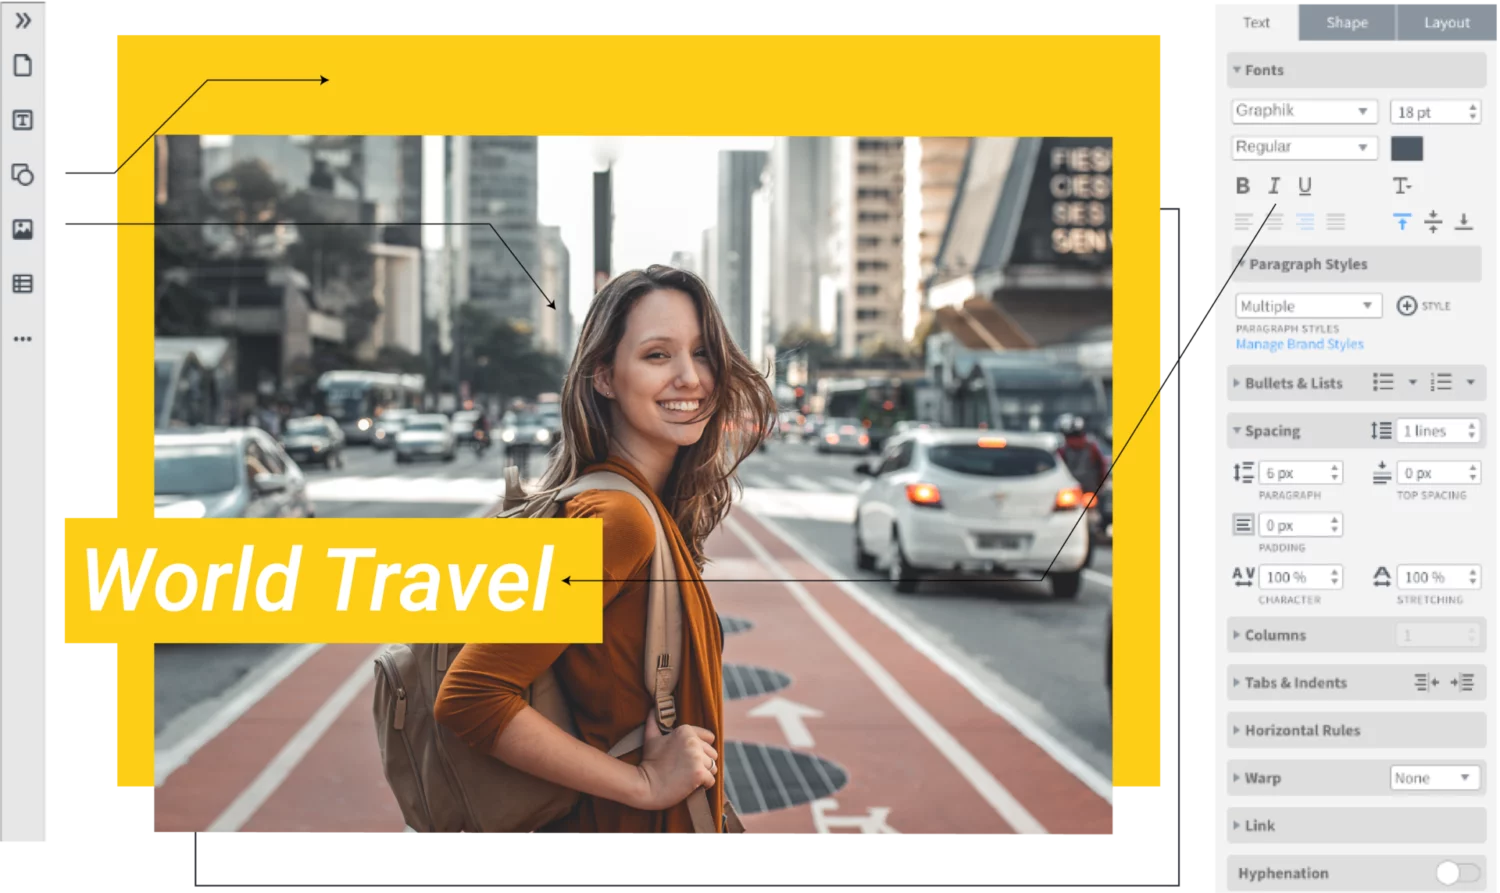
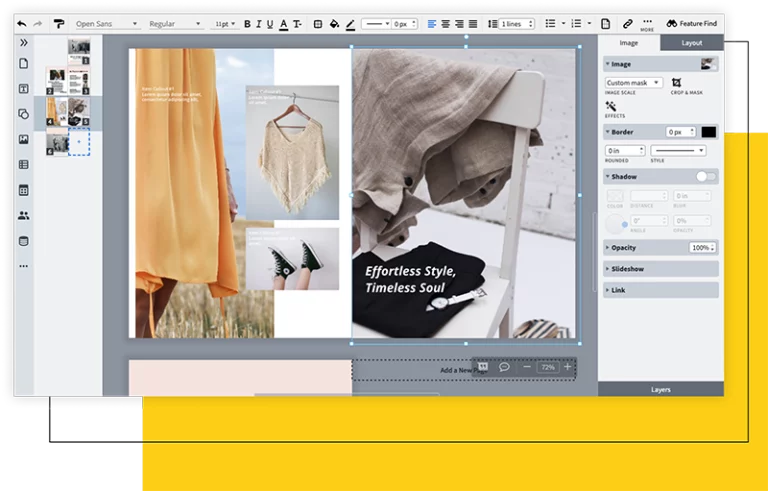
With so many features to offer, Marq had to create three toolboxes. Here’s how to use them.
In the interface, in the left pane, simply drag & drop the element (e.g. text, shape, video, image or table) you wish to add to your layout—plop!—into your design. Now this is when the fun starts.
In the right pane are all the attributes of the element you’re working on. The Shape tab gives you options to change these attributes. For instance, if you’re working on an image, you can change the borders, fill color, shadows & opacity. The Layout tab helps you to position your image precisely and lock features of the image you don’t want anyone else to change.
Like other graphic design software—Microsoft Word and Acrobat InDesign, for example—Marq follows the same UI standards for where editing features are located. For instance, right-click on an element and select a function from the context menu, like changing the layout sequence of elements. To align elements exactly, select multiple shapes, right-click and choose an alignment, such as left-aligned or centered.
Marq is ideal for small businesses as it provides powerful collaboration features. For instance, you can right-click on an element and select Add Comment. In the dialog box, type @ and then select the user or users you wish to discuss your project with.
Ready to make your booklet?
Booklets are fun for hobbies and kids’ projects at home, and they’re a cost-effective option for businesses to create enterprising and eye-catching marketing collateral. Beautifully designed, customizable templates help you to manage your brand and collaborate efficiently with your team in the secure Marq cloud.
Create all of your on-brand
collateral in Marq